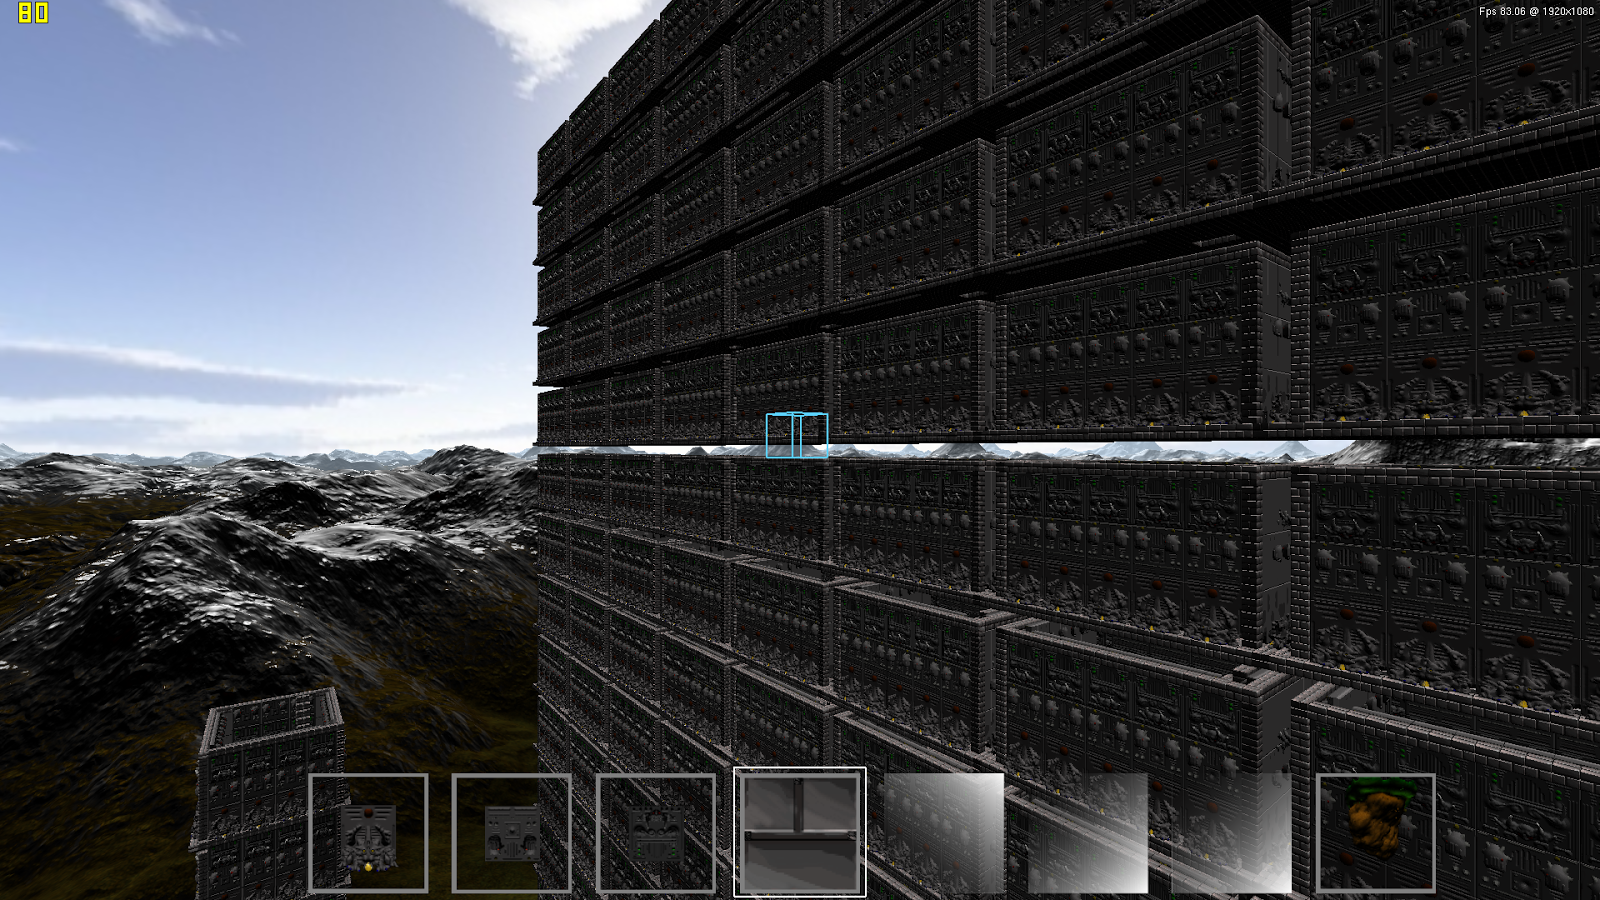
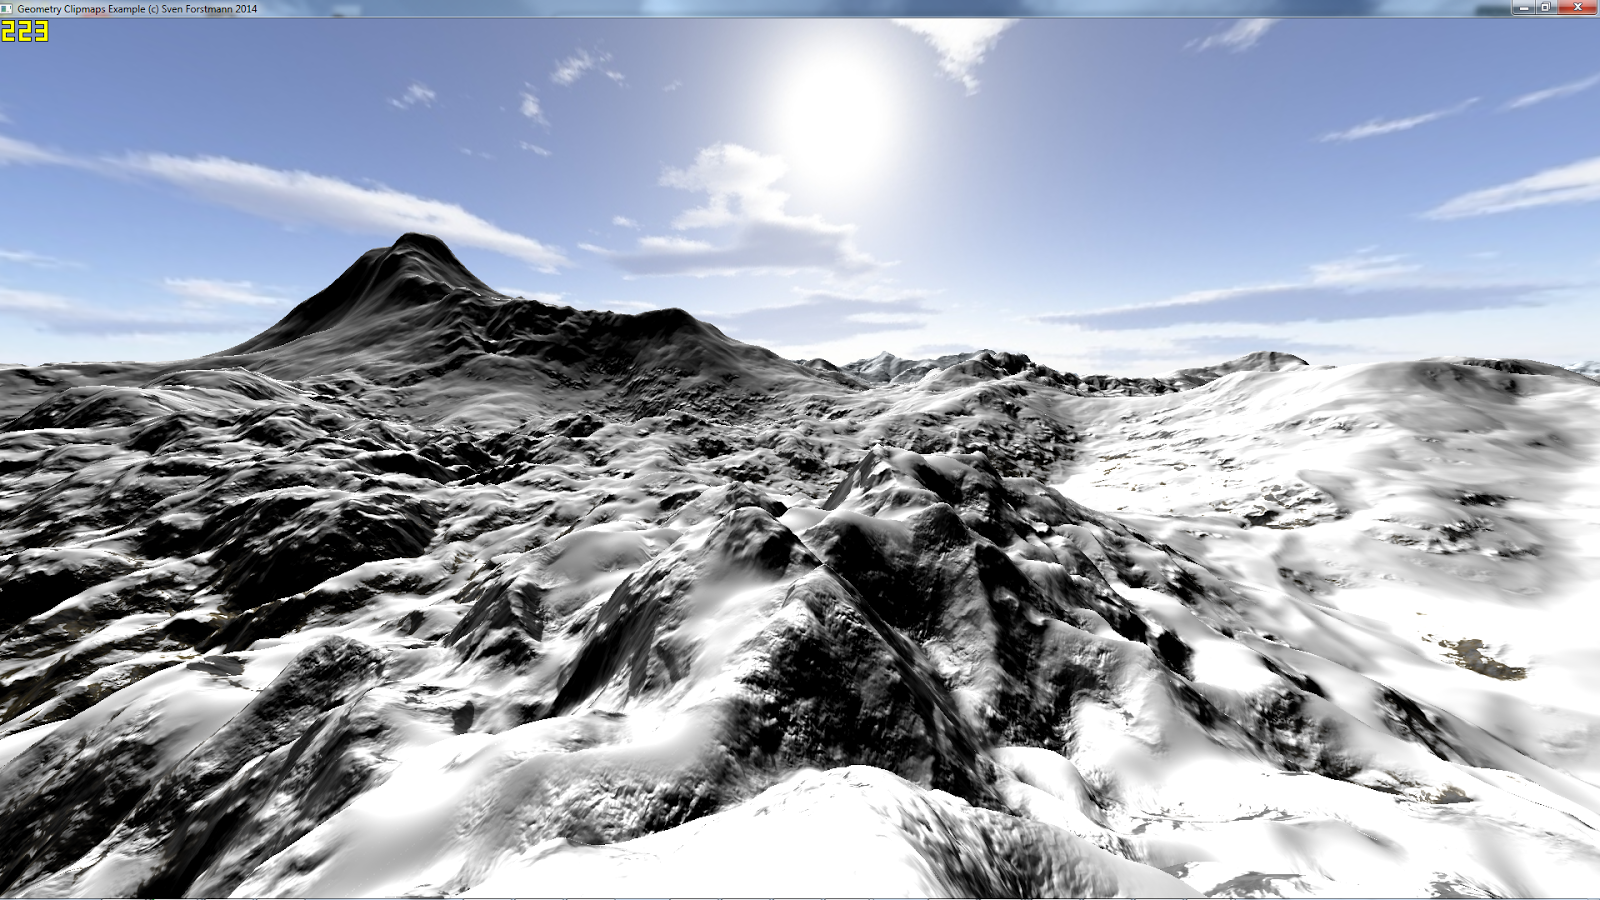
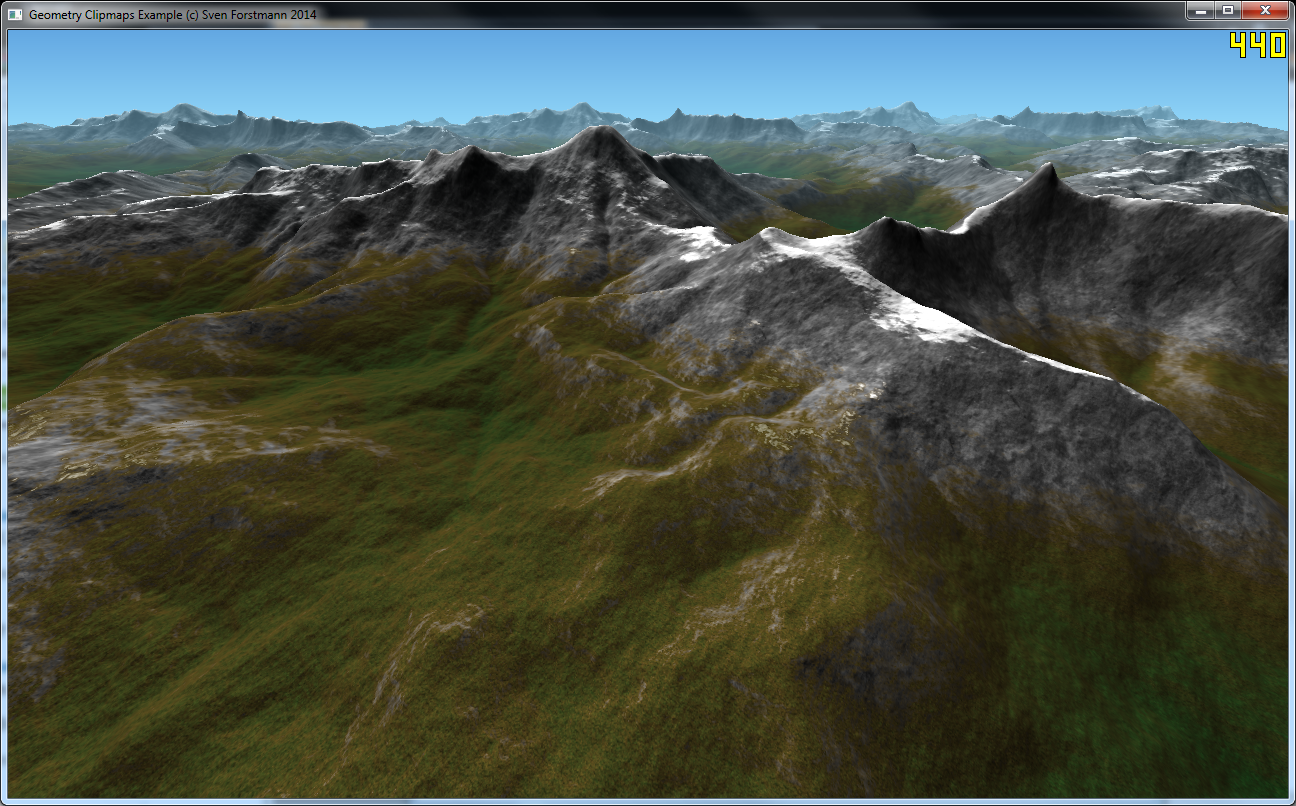
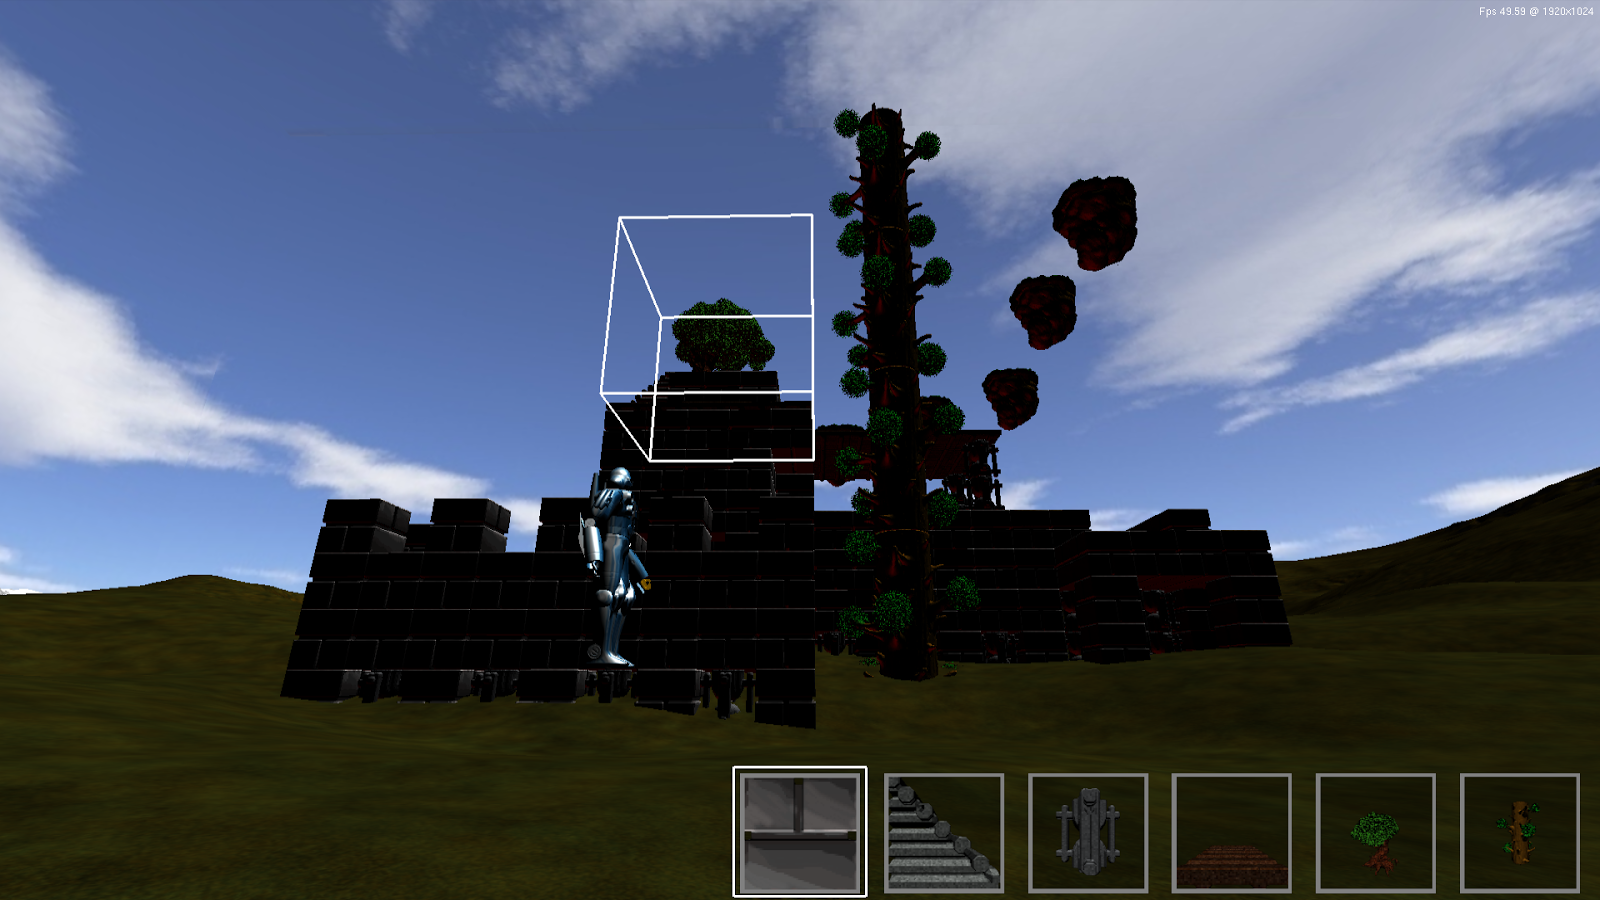
Copy and Paste works well now. Areas of voxels can be grouped to new entities for placing them in the scene. The size of the entire voxel data of the screenshot below on disk is just 1.3MB, which is quite OK. Thanks to my new graphics card, voxel raycasting and terrain rendering also runs smoothly at 60+ fps at full HD resolution now. Also worth a note: The raycasting method is updated to allow octrees greater than 16 levels - the scene below is created in an 18 level octree. Now, problems with precision begin to arise, which need to be solved.
Donnerstag, 22. Mai 2014
Dienstag, 13. Mai 2014
Quadric Mesh Simplification with Source Code
In the past days I have written a quadric based mesh simplification program. After searching the internet I couldnt find any code that was free to use, not unnecessarily bloated, fast and memory efficient, even the quadric based method is soon 20 years old. I therefore decided to write one myself.
Features / Summary:
The result is short and easy to use in case you need to adopt it to your project. You can fetch the C++ Project with source here: (about 300 lines for the main part, contained in Simplify.h )
Download Source and Data
The code is about 4x-7x faster than Meshlab, which is already fast. Using multi-core programming, it could even be faster.
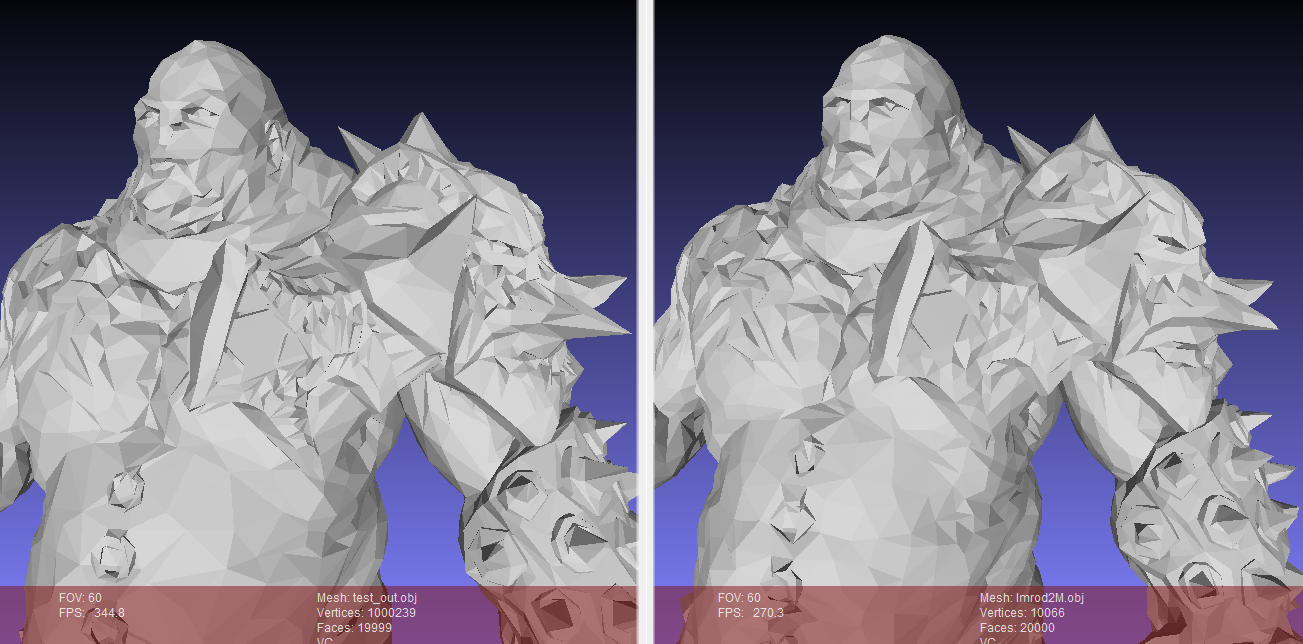
Here a comparison along Meshlab, QSlim and this method:
Program output (left) and Meshlab (right). Note that Meshlab produces floating teeth and looses details around the eyes, nose and the mouth region. Reduction was 85k -> 3k Triangles.
Original (left) this code (middle) and meshlab (right)
Here another comparison: Program output (left) and Meshlab (right).
Features / Summary:
- Threshold based, therefore faster than sorting based methods
- Since the Quadric Matrices are symmetric, only 10 elements are stored & computed per Matrix instead of 16
- Non-closed meshes are supported by extra treating mesh borders
- Simplifies 2.000.000 triangles to 20.000 triangles in 3 seconds on a Core i7
- MIT License
- MS Visual Studio 2012 , C++
Update Sept.20th 2014 : improved quality of reduced borders
Download Source and Data
The code is about 4x-7x faster than Meshlab, which is already fast. Using multi-core programming, it could even be faster.
Here a comparison along Meshlab, QSlim and this method:
Program output (left) and Meshlab (right). Note that Meshlab produces floating teeth and looses details around the eyes, nose and the mouth region. Reduction was 85k -> 3k Triangles.
Original (left) this code (middle) and meshlab (right)
Here another comparison: Program output (left) and Meshlab (right).
Samstag, 3. Mai 2014
Raycaster Speed-Up up to 400% by Image Warping (ReProjection)
Introduction: Since real-time raytracing is getting faster like with the Brigade Raytracer e.g., I believe this technology can be an important contribution to this area, as it might bring raytracing one step closer to being usable for video games.
Algorithm: A technology I am working on since a while now is to exploit temporal coherence between two consecutive rendered images to speed up ray-casting. The idea is to store the x- y- and z-coordinate for each pixel in the scene in a coordinate-buffer and re-project it into the following screen using the differential view matrix. The resulting image will look as Fig.1.
The method then gathers empty 2x2 pixel blocks on the screen and stores them into an indexbuffer for raycasting the holes. Raycasting single pixels too inefficient. Small holes remaining after the hole-filling pass are closed by a simple image filter. To improve the overall quality, the method updates the screen in tiles (8x4) by raycasting an entire tile and overwriting the cache. Doing so, the entire cache is refreshed after 32 frames. Further, a triple buffer system is used. That means two image caches which are copied to alternately and one buffer that is written to. This is done since it often happens that a pixel is overwritten in one frame, but becomes visible already in the next frame. Therefore, before the hole filling starts, the two cache buffers are projected to the main image buffer.
Limitations: The method also comes with limitations of course. So the speed up depends on the motion in the scene obviously, and the method is only suitable for primary rays and pixel properties that remain constant over multiple frames, such as static ambient lighting. Further, during fast motions, the silhouettes of geometry close to the camera tends to loose precision and geometry in the background will not move as smooth as if the scene is fully raytraced each time. There, future work might include creating suitable image filters to avoid these effects.
Results: Most of the pixels can be re-used using this technology. As only a fraction of the original needs to be raycasted, the speed up is significant and up to 5x the original speed, depending on the scene (see Fig.2 - Fig.4). Resolution for that test was 1024x768, the GPU was an NVIDIA GeForce GTX765M.
Here also two videos showing this technology in action: Video1 Video2
(I uploaded them a while ago)
Finally a few papers for further reading:
Exploiting Temporal Coherence in Ray Casted Walkthroughs
Iterative Image Warping
A Shared-Scene-Graph Image-Warping Architecture for VR: Low Latency versus Image Quality
Three-Dimensional Image Warping on Programmable Graphics Hardware
Accelerating Real-Time Shading with Reverse Reprojection Caching
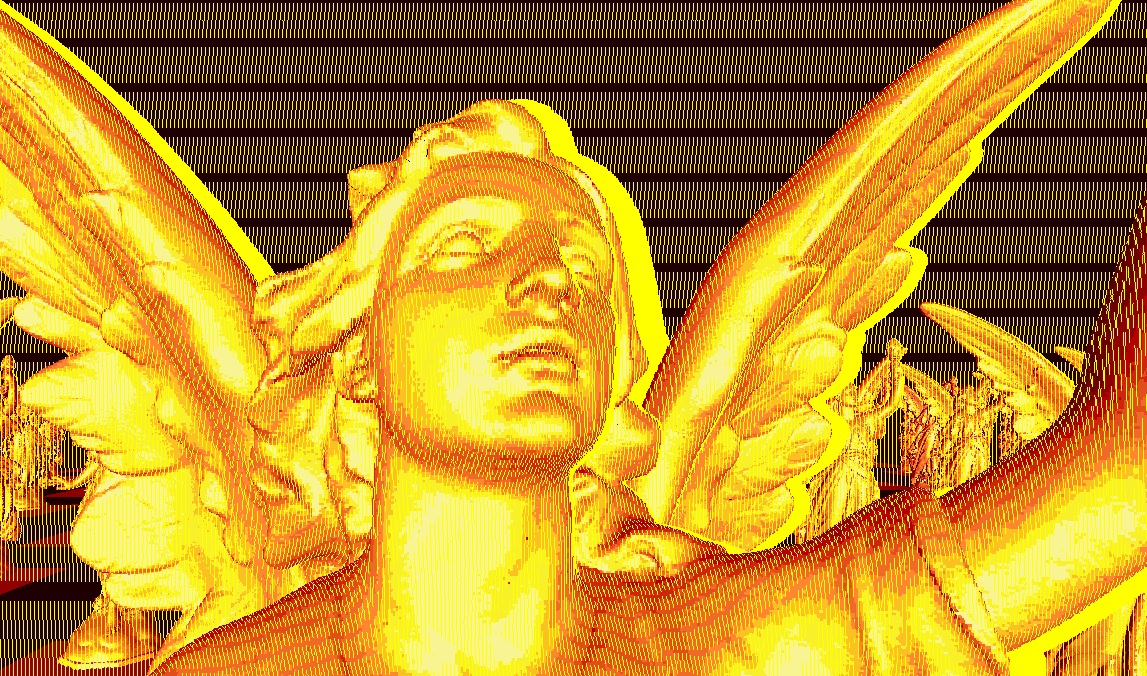 |
| Fig.1 Result after basic re-projection |
 |
| Fig.2 Original Version |
 |
| Fig.3 With Re-Projection Enabled + In Motion |
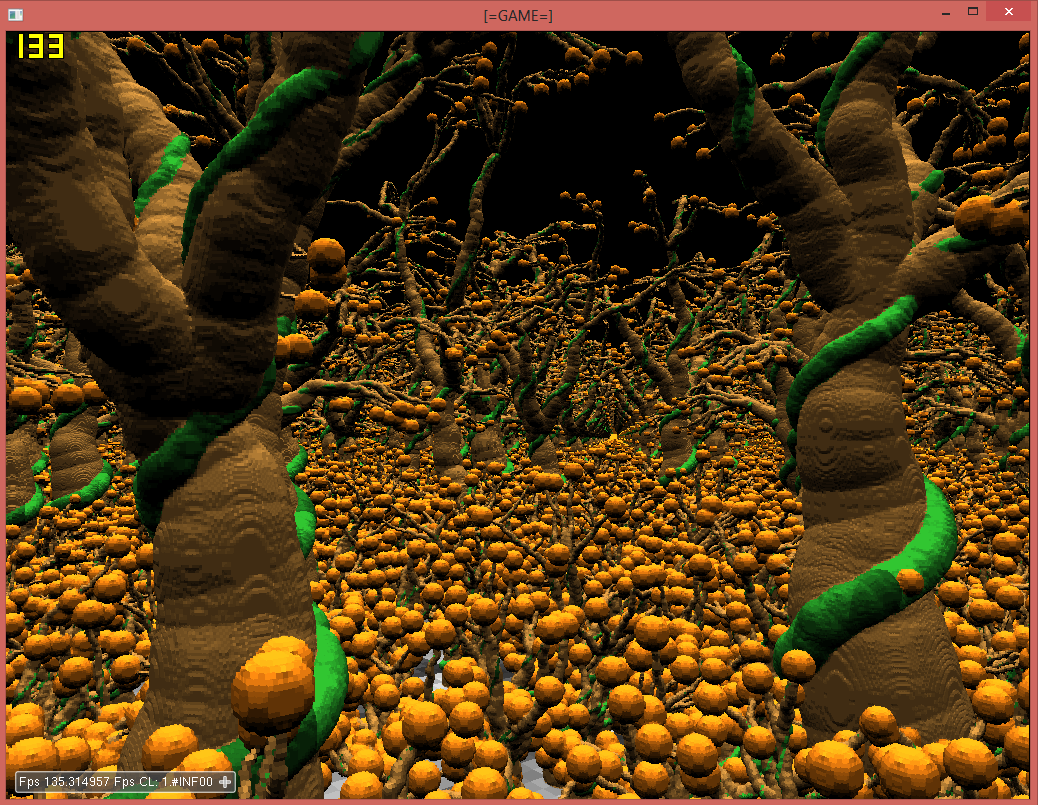 |
| Fig.4 With Re-Projection Enabled + Standing |
Mittwoch, 30. April 2014
Polygon Rendering vs. Voxel Raycasting
Since I started the project I have always wondered if it wouldnt be better to use polygons/triangles rather than voxels. To verify this decision, I created a reasonably complex test scene from multiple instances of the same block, and rendered the scene once with triangles using Display Lists & LOD and second using voxel raycasting (LOD inherently). The triangle block is created by exporting the voxels as polygon mesh, and then using Meshlab to reduce the triangles and create multiple LOD levels.
It turns out that triangles are much faster for a small to a medium number of instances (its about equal for 10x10x10 = 1000 instances) - but when having a large amount of 8000 instances (32 Million Triangles), 40x5x40 blocks, voxel raycasting is significantly faster ( 40 vs 13 fps ).
For triangles, I havent used any sophisticated occlusion culling. It would therefore be interesting to see how much more performance could be achieved using the voxel based umbra or the software based rasterization presented by intel.
For the ones of you that would like to experiment with occlusion culling, the source & data of the polygon benchmark can be downloaded [here].
 |
| Raycasting Outside |
 |
| Raycasting inside |
 |
| Triangles Outside |
 |
| Triangles inside |
Sonntag, 27. April 2014
Samstag, 26. April 2014
NVIDIA GTX580M vs ATI Radeon R9 270x @1920x1024
Today I tried to run the demo on a newer ATI 270x card of a friend. The result was better than expected as the ATI card achieved greater 100 fps for most of the time. On the GTX580M, the framerate was around 40 outside and ~30 indoors.
New features in this version: FXAA & loading / saving of level data.
New features in this version: FXAA & loading / saving of level data.
 |
| ATI Radeon R9 270x |
 |
| NVIDIA GTX 580M |
Dienstag, 22. April 2014
Collision Detection
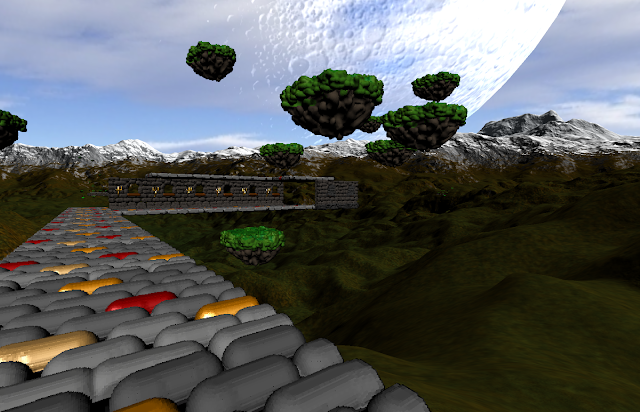
The next important feature is mostly working now : Collision Detection. I played a bit around to create a castle in the sky.
Samstag, 12. April 2014
New Sandbox Features
The editor now has a shelf and add/delete function for block setting as well as a box to indicate where to set a block. Further (2nd video), the new version features sound driven light effects that can be chosen when voxel sculpting.
Sonntag, 6. April 2014
Mittwoch, 2. April 2014
Minecraft-Style Sandbox Editing and Voxel Cube Crafting
Today I am posting a video that shows how the entire process from creation a voxel cube to using the voxel cube(s) for sandbox style world editing. It is captured in real-time, so feel free to zap if you feel bored at any point.
Dienstag, 1. April 2014
Dienstag, 11. März 2014
Combined Voxel - Polygon Rendering
Today I am proud to present the first screenshot of combined voxel raycasting / triangle based terrain rendering of a simple scene. Better results will hopefully follow in the next posts.
Sonntag, 2. März 2014
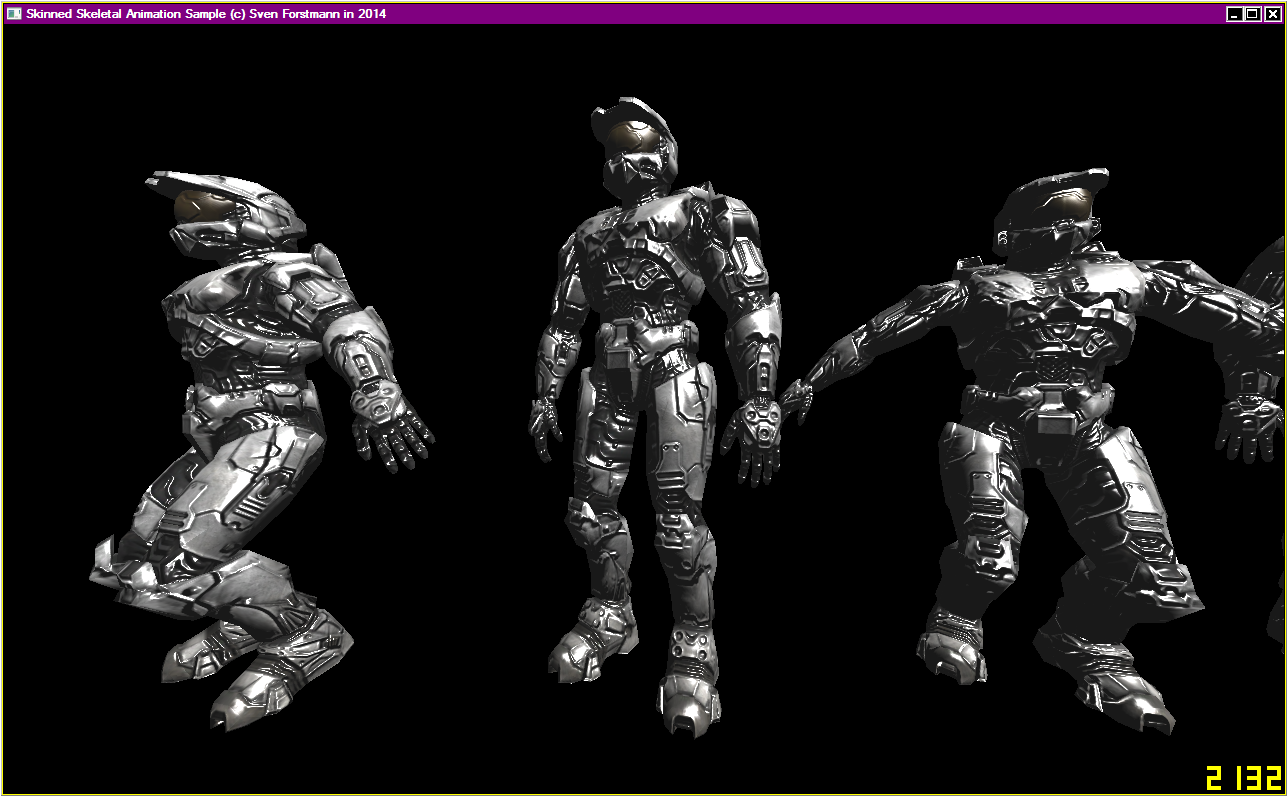
Skinned Skeletal Animation Tutorial with Source Code
Today I completed a skinned skeletal animation tutorial, which is very helpful if you are just about to start with game development.
Different from the other tutorials I found in the web, this one is very light weight ( < 800 lines for the main mesh & animation code ) and works well with most modeling environments.
DOWNLOAD SOURCE + DATA
Summary
It has the following properties / features:
Also getting a bone matrix to put a weapon in the hand of the player e.g. is very simple:
Setting the arm joint individually for shooting a weapon e.g. works as follows:( press F6 in the demo )
The workflow is as follows:
Different from the other tutorials I found in the web, this one is very light weight ( < 800 lines for the main mesh & animation code ) and works well with most modeling environments.
DOWNLOAD SOURCE + DATA
Summary
It has the following properties / features:
- GPU Skinning / Matrix Palette Skinning
- Bump Mapping (automatic normal map generation)
- Spheric environment mapping
- Ogre XML Based
- Shaders in GLSL
- Visual Studio 2010
- Select LOD level with F1..F5
static Mesh halo("halo.material",//     required material file)
         "halo.mesh.xml",        //     required mesh file
         "halo.skeleton.xml");   // optional skeleton file

int idle = halo.animation.GetAnimationIndexOf("idle");

halo.animation.SetPose(idle, // animation id (2 animations are available)
              time_elapsed); // time in seconds

halo.Draw( vec3f(0,0,0),     // position
           vec3f(0,0,0),     // rotation
        0);                  // LOD level
Also getting a bone matrix to put a weapon in the hand of the player e.g. is very simple:
int index  = halo.animation.GetBoneIndexOf("joint1");
matrix44 m = halo.animation.bones[ index ].matrix;
Setting the arm joint individually for shooting a weapon e.g. works as follows:( press F6 in the demo )
// get the index
int index  = halo.animation.GetBoneIndexOf("joint2");

// get / modify / set the matrix
matrix44 m = halo.animation.bones[ index ].matrix;
m.x_component()=vec3f(1,0,0);
m.y_component()=vec3f(0,1,0); // set the rotation to identity
m.z_component()=vec3f(0,0,1);
halo.animation.bones[ index ].matrix=m;

// re-evaluate the child bones
loopi(0,halo.animation.bones[ index ].childs.size())
{
    halo.animation.EvalSubtree(
        halo.animation.bones[ index ].childs[i], // bone id
        halo.animation.animations[0],            // animation
        -1);                                     // key frame -1 means not use the animation
}
The workflow is as follows:
- Design the Model in Maya/MAX/Blender/etc.
- Export the model using the OgreExporter
- Convert the model from Ogre binary to Ogre XML (batch file is included)
- Load the model in the tutorial code
The Main Skinning in GLSL:
The main skinning is done in the vertex shader and only requires a few lines.
For the shader, the skinning weights are stored in the color information as 3 floats.
The bone IDs are unpacked from the w coordinate of the position information.
The bone matrixes are stored as simple matrix array..uniform mat4 bones[100];
uniform int use_skinning;
void main(void)
{
mat4 mfinal = gl_ModelViewMatrix ;
// skinning
if(use_skinning==1)
{
vec3 weights= gl_Color.xyz;
vec3 boneid = gl_Vertex.w * vec3( 1.0/128.0 , 1.0 , 128.0 );
boneid = (boneid - floor(boneid))*128.0;
mat4 mskin = bones[int(boneid.x)]*weights.x+
bones[int(boneid.y)]*weights.y+
bones[int(boneid.z)]*weights.z;
mfinal = mfinal * mskin;
}
gl_Position = gl_ProjectionMatrix * mfinal * vec4(gl_Vertex.xyz,1.0);
}
Note:
Animating Notes for Maya
For Maya, put all animations in one time-line and export them as separate animations.
Ogre Export
Tangents need to be exported as 4D, to include the handedness. The tutorial version does not generate the tangents in the shader as it is faster to read them from the memory.
Bump Mapping
For the Ogre Material file, the bump map needs to be added manually by hand using the texture_bump parameter as follows:
texture Texture\masterchief_base.tif
texture_bump Texture\masterchief_bump_DISPLACEMENT.bmp
Ambient Texture Map
Same here. For the Ogre Material file, the ambient map needs to be added manually by hand using the texture_ambient parameter.
Environment Mapping
Environment mapping can be switched on in the material file using the following parameter:
env_map spherical
Screenshot of the settings in the OGRE exporter for Maya:
Commands to convert the OGRE binary to XML with 5 LODs
..\ogre_xml_converter\OgreXMLConverter.exe halo.mesh tmp\tmp.xml
..\ogre_xml_converter\OgreXMLConverter.exe -l 5 tmp\tmp.xml tmp\tmp.mesh
..\ogre_xml_converter\OgreXMLConverter.exe tmp\tmp.mesh halo.mesh.xml
..\ogre_xml_converter\OgreXMLConverter.exe halo.skeleton halo.skeleton.xml
Summary of the Code Structure:
Main.h :
Main.h :
- Main code
- Reads .mesh.xml & .material files
- Animation is optional
- If an animation is present, it is stored in the animation variable
- Per vertex, the following parameters are stored: position xyz, normal, texture UV, tangent, tangent handedness, 3x skin weight and 3x bone index.
- Bones are stored in the vertex shader as matrix palette (100 bones max)
MeshAnimation.h :
- Reads .skeleton.xml
- Bones are stored in the bones array
- Animations are stored as tracks of keyframes for each animated bone
- After reading the animation, it is resampled to 20 frames per second
- To set an animation, the skeleton matrices are computed by traversing the structure
- Afterwards, they are multiplied with the inverse skinning matrix before passing to the shader (could be precalculated)
- Interpolation is linear so far - slerp could be added for better transitions.
Download
Get the ZIP here [ Download Source & Binary Files ] .
The skinned character is included as rigged Maya binary file & obj file.
You can find more free characters for example here.
Freitag, 28. Februar 2014
Tangent Space Normal Mapping without storing Tangents
After experimenting with the tangent space normal maps, it turned out that its possible to compute the tangent space in the vertex shader quite fast, which saves memory and bandwidth for rendering. Since the light computation is in camera space, tangent and co-tangent can be approximated as follows in the vertex shader:
VS
normal = normalize((gl_ModelViewMatrix* vec4(gl_Normal.xyz,0.0)).xyz);
tex_tan = cross(normal.xyz,vec3(0,-1,0));
tex_cotan = cross(normal.xyz,tex_tan);
tex_uv = gl_MultiTexCoord0.xy;
For the fragment shader, we need to first get the direction of the texturing by using the derivatives before we can compute the pertubed normal vector as follows:
FS
vec3 bump=vec3(-1.0,-1.0,-1.0)+2.0*texture2D(texBump,tex_uv).xyz;
vec2 tdx=normalize(dFdx(tex_uv)); // tex coord derivative in x
vec2 tdy=normalize(dFdy(tex_uv)); // tex coord derivative in y
vec3 n =bump.z*normal // Z-direction of the normalmap
+bump.x*(tdx.x*tex_tan+tdx.y*tex_cotan) // X-direction
+bump.y*(tdy.x*tex_tan+tdy.y*tex_cotan);// Y-direction
n=normalize(n);
Its obviously an approximation, but so far I am satisfied with the result.
Note that mirrored UV's will need special treatment which is not included above.
Update: Using the geometry shader for computing the (tdx.x*tex_tan+tdx.y*tex_cotan) terms might improve the performance.
Note that mirrored UV's will need special treatment which is not included above.
Update: Using the geometry shader for computing the (tdx.x*tex_tan+tdx.y*tex_cotan) terms might improve the performance.
Mittwoch, 26. Februar 2014
Montag, 24. Februar 2014
Protagonist in the Scene
After rewriting the skinning (now GPU skinning) and adding light & texturing (not yet shadows though), the protagonist is in the scene! Some of you might recognize ;)
The previous MD5 skinning had the drawback not all modeling environments were supported well. The new version is now OGRE based. It has the advantage that the exporter is open source and always kept up to date for new versions of Maya, Blender and more due to its active community.
The previous MD5 skinning had the drawback not all modeling environments were supported well. The new version is now OGRE based. It has the advantage that the exporter is open source and always kept up to date for new versions of Maya, Blender and more due to its active community.
Mittwoch, 12. Februar 2014
Samstag, 8. Februar 2014
High Detail for Close Geometry
Using multiple texture layers, also close geometry can be very detailed. Thanks to ClipMaps, it is not necessary to use any tessellation or any raycasting based mapping technique as it inherently provides sufficient details.
Donnerstag, 6. Februar 2014
Cubic Texture Sampling, Walkthru Mode and Skybox
Few updates:
- 1st person walkthru mode
- Skybox
- Cubic heightmap sampling, so closeup geometry remains smooth
- Cubic texure sampling, so snow does not have aliasing anymore
- More fine details for the heightmap
Samstag, 1. Februar 2014
Textured Procedural DLA Terrain [Demo included]
First screenshot using textures. Its based on the Tutorial code below. I have increased the detail, therefore the framerate is lower than the sample. Will still take a while until it can be integrated into the voxel engine though.
You can fetch the demo here: [-DOWNLOAD-] (64MB)
Update: Bugfix for glsl.h line 35( thx Aransentin ) & Added multitexturing for closeup details.
Abonnieren
Posts (Atom)
